 |
|||||
| Home | Research | For Teachers | HISTORY Level 1 Level 2 Level 3 |
PRINCIPLES Level 1 Level 2 Level 3 |
CAREER Level 1 Level 2 Level 3 |
| Gallery | Hot Links | What's New! | |||
| Web Administration and Tools | |||||
 |
|||||
| Home | Research | For Teachers | HISTORY Level 1 Level 2 Level 3 |
PRINCIPLES Level 1 Level 2 Level 3 |
CAREER Level 1 Level 2 Level 3 |
| Gallery | Hot Links | What's New! | |||
| Web Administration and Tools | |||||
![]()
Equipment:
|
 |
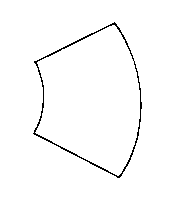
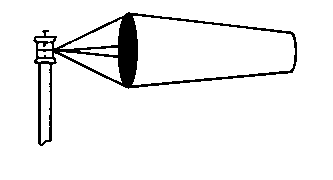
Form the hanger into a loop about 9" in diameter. Attach the 4 wires to this circular loop at 4 equidistant points on its circumference. Cut cloth into a sleeve (see diagram above). Sew sides together, making a cone, and sew larger end of the cone to loop. Bind exposed ends of wires to the spool. Place the nail through the spool so that the spool may pivot freely on the nail, and hammer the nail into the end of the long stick. Place stick outdoors; nail it to a tall post or to a rooftop away from obstructions, so that the sock may swing freely with the wind.
The large end of the sock will catch the wind, so that the small end will point away from the direction from which the wind is blowing, or will droop if there is not enough wind to keep it extended.
Observe the position of the sock at different times for changes in direction and force of the wind.
Windsocks are used chiefly at airports to indicate wind direction for takeoffs and landings. They help the pilots select the proper runway, so that they can take off and land into the wind.

Send all comments to ![]() aeromaster@eng.fiu.edu
aeromaster@eng.fiu.edu
© 1995-98 ALLSTAR Network. All rights reserved worldwide.
Updated: February 23, 1999